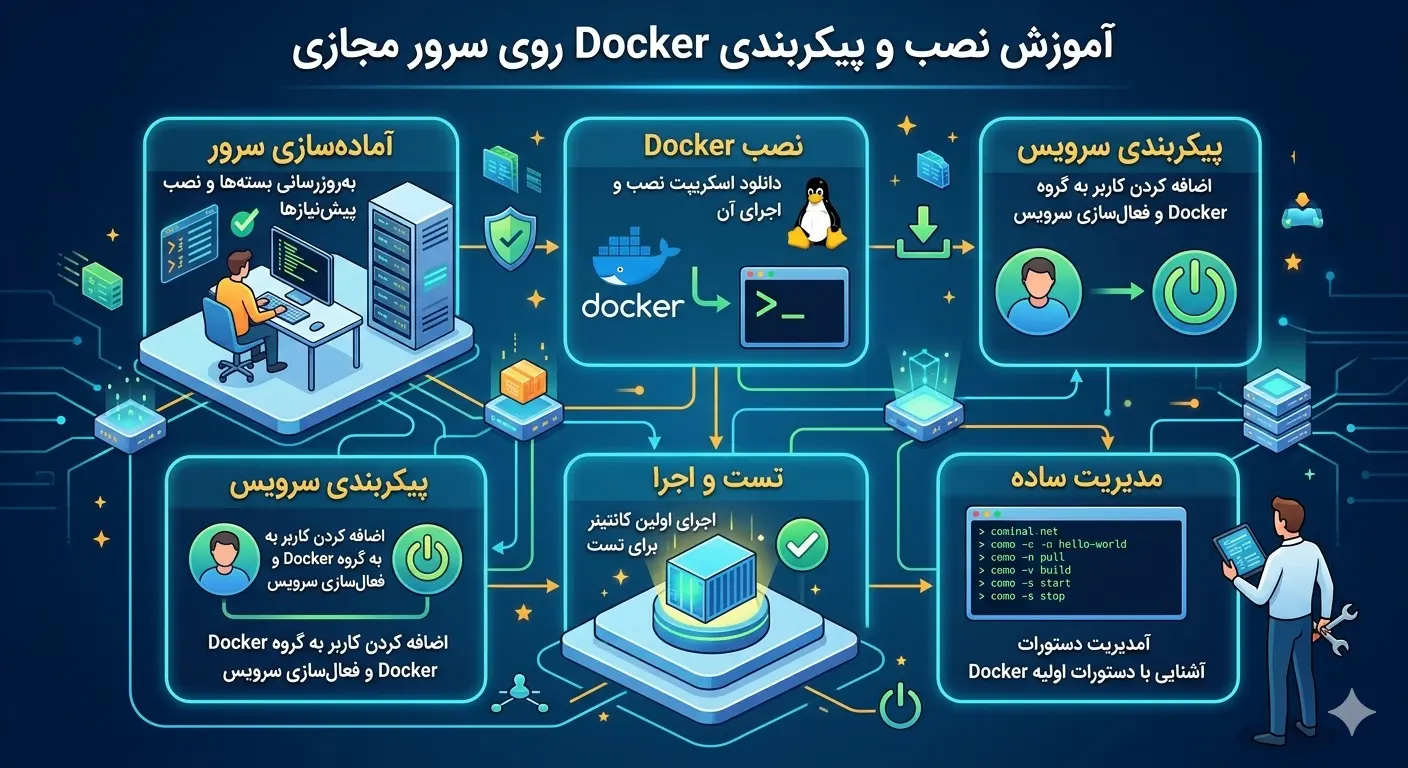
Installing Docker on a virtual server is one of the most important steps to modernize the software development and deployment process. By providing the concept of a container, Docker allows you to run applications with all their dependencies in an isolated and portable package. This means no more with the famous phrase "It worked on my system!" You won't face it, because the container runs exactly the same in every environment. In this comprehensive tutorial from Rapido Server, you will learn to install, configure and secure Docker on your Linux virtual server and run your first containers.
What is Docker and why should we use it?
Docker is an open source platform for building, shipping and running applications inside containers. A container is a standard software unit that styles application code, along with libraries, dependencies, and configurations, into a single package. Unlike virtual machines, which each emulate an entire operating system, containers share the core of the host operating system and are therefore much lighter and faster.
The most important advantages of using Docker are:
- Portability: A container runs exactly the same on a developer's laptop, a test server, and a production environment.
- Isolation: Each application runs in its own separate environment and does not interfere with other applications.
- Low resource consumption: Containers spin up in seconds and consume much less memory than a virtual machine.
- Scalability: You can easily run multiple instances of a service and distribute the load among them.
Note: You need at least a server with 1GB of RAM to run Docker smoothly, but 2GB or more is recommended for real projects. You can get the right server from the Buy Virtual Server page.
Server prerequisites and preparation
Before installing Docker on the virtual server, you should make sure that the operating system is up to date. Docker supports popular Linux distributions such as Ubuntu, Debian, CentOS and AlmaLinux. First, update the system packages with the following command:
apt update && apt upgrade -yThen install some prerequisite packages needed to add the official Docker repository:
apt install ca-certificates curl gnupg lsb-release -yAlso check that your system architecture and kernel version are compatible with Docker requirements. Docker requires Linux kernel version 3.10 or higher, which almost all modern servers meet this requirement. To view the kernel version:
uname -rInstalling Docker on the virtual server from the official repository
The best way to install Docker on a virtual server is to use the official Docker repository, as it always provides you with the latest stable version. First, add the official Docker GPG key:
install -m 0755 -d /etc/apt/keyrings
curl -fsSL https://download.docker.com/linux/ubuntu/gpg -o /etc/apt/keyrings/docker.asc
chmod a+r /etc/apt/keyrings/docker.asc
Then add the Docker repository to apt sources:
echo "deb [arch=$(dpkg --print-architecture) signed-by=/etc/apt/keyrings/docker.asc] https://download.docker.com/linux/ubuntu $(lsb_release -cs) stable" | tee /etc/apt/sources.list.d/docker.listNow update the package list again and install the main Docker packages:
apt update
apt install docker-ce docker-ce-cli containerd.io docker-buildx-plugin docker-compose-plugin -y
For users who are in a hurry or want a simpler environment, there is also an official quick install script that does all these steps in one go:
curl -fsSL https://get.docker.com | shChecking the installation and running of the first container
After the installation is complete, enable the Docker service to run automatically every time the server is started:
systemctl start docker
systemctl enable docker
Check the Docker version to make sure the installation is correct:
docker --versionNow it's time to run your first container. The test image hello-world is designed for exactly this purpose:
docker run hello-worldIf you see the Docker welcome message, everything is working fine. For a more realistic experience, you can run an Nginx web server in a container and make it available on port 80 of the server:
docker run -d -p 80:80 --name webserver nginxIn this command, switch -d runs the container in the background, -p 80:80 binds the server port to the container port, and --name specifies a human-readable name for the container. Now if you open the server IP address in the browser, you will see the default page of Nginx running from inside a container. The interesting thing is that you did not install any software on the server itself; Everything remains isolated inside the container and with a delete command, no trace of it is left on the system. This clean and reversible feature is one of the biggest reasons for Docker's popularity among developers and server administrators.
Management of containers and images
Once the containers are running, you need to be able to manage them. The following table summarizes the most commonly used Docker commands:
| order | Application |
|---|---|
docker ps | Show running containers |
docker ps -a | Show all containers including stopped ones |
docker images | Display the list of downloaded images |
docker stop <name> | Stopping a container |
docker rm <name> | Delete a container |
docker logs <name> | View container logs |
To enter a running container and run a command inside it, use exec:
docker exec -it webserver bashTo clean up unused resources such as stopped containers, unused networks, and hanging images, there is a very useful prune command that frees up disk space:
docker system prune -aUsing Docker Compose for multi-service projects
When your project consists of multiple services—for example, a web application, a database, and a Redis cache—it becomes difficult to manage them individually. This is where Docker Compose comes in handy. With one docker-compose.yml file you can define the entire application architecture. A simple example of this file:
services:
  web:
    image: nginx
    ports:
      - "80:80"
  db:
    image: postgres:16
    environment:
      POSTGRES_PASSWORD: secret
    volumes:
      - db_data:/var/lib/postgresql/data

volumes:
  db_data:
After creating this file, you raise the whole stack with one command:
docker compose up -dAnd to stop and clear all services:
docker compose downUsing volume in this example ensures that the database data is preserved even after the container is removed and rebuilt. This is one of the key concepts in working with Docker, which is called Data Persistence.
Build custom image with Dockerfile
So far we've used ready-made images, but the real power of Docker is revealed when you build your own application image. For this, a file called Dockerfile is used, which is a set of instructions for creating an image. Suppose you have a Node.js application; An example Dockerfile for that looks like this:
FROM node:20-alpine
WORKDIR /app
COPY package*.json ./
RUN npm install --production
COPY . .
EXPOSE 3000
CMD ["node", "server.js"]
Each line of this file creates a layer in the image. The FROM command specifies the base image, WORKDIR specifies the working directory, COPY imports files into the image, RUN executes commands at build time, and CMD specifies the main container execution command. Note that first we copied the package file and installed the dependencies and then copied the rest of the code; This arrangement makes Docker use the layer cache better and subsequent builds are faster. To create an image from this file:
docker build -t myapp:1.0 .Once built, you can run a container from this image:
docker run -d -p 3000:3000 --name myapp myapp:1.0Note: Using light base images such as alpine versions greatly reduces the final image size and increases security, as they have a smaller attack surface.
Network management in Docker
Containers need networking to communicate with each other. Docker creates multiple networks by default, but the best practice for projects is to create a dedicated network. The advantage of custom networking is that containers can find each other by name instead of IP address. To create a grid:
docker network create app-networkThen connect the containers to this network:
docker run -d --name db --network app-network postgres:16
docker run -d --name web --network app-network myapp:1.0
Now the web container can simply connect to the database with the db name, without needing to know its IP address. This built-in service discovery makes managing multi-part applications very simple and is one of the reasons why Docker is so popular in microservices architectures.
Publishing the image in the registry
After building an image, you often want to use it on other servers. To do this, you publish the image to a registry such as Docker Hub. First, log in to your account:
docker loginThen tag the image with your username and send it:
docker tag myapp:1.0 username/myapp:1.0
docker push username/myapp:1.0
From now on, you can download and run the same image on any other server with one command. For private projects, you can use private registries or cloud services to keep your images from being publicly available. This build, release, and deployment workflow forms the backbone of modern continuous deployment (CI/CD) processes.
Important security tips when working with Docker
Security is especially important in container environments. A few key recommendations that every server administrator should follow:
- Running the container with a non-root user: Use the USER command in the Dockerfile as much as possible to run the application as a normal user.
- Using Official and Authentic Images: Always get images from reputable sources, preferably from specific tagged versions, not the latest ones.
- Regular Update: Update images and Docker itself regularly to fix security vulnerabilities.
- Limit resources: Limit the resource consumption of each container with the
--memoryand--cpusswitches so that one container does not occupy the entire server.
Warning: Never put sensitive information such as passwords and API keys directly into the Dockerfile. Use environment variables or Secrets management tools instead.
To learn more about server management and DevOps tools, we recommend following the Rapido Server Articles series, which is updated regularly.
Monitoring resources and maintaining containers
After running containers on a production server, it is important to continuously monitor resource consumption. Docker has a built-in command to view live CPU, memory and network consumption of each container:
docker statsThis command displays a live table that helps you identify the most consumed containers. If you notice that a container is consuming too many resources, you can set a limit when running to avoid stressing the server:
docker run -d --memory="512m" --cpus="1.0" --name limited-app myapp:1.0For long-term maintenance, also set the appropriate restart policy so that containers are automatically restarted in the event of a server crash or restart. The --restart unless-stopped option is a good choice for most production services:
docker run -d --restart unless-stopped --name web -p 80:80 nginxIt is also recommended to manage Docker logs, as they can fill up disk space if left unchecked. You can limit the size and number of log files in the daemon configuration file so that your server always has enough space. Combining these monitoring and maintenance habits will ensure the long-term sustainability of your container infrastructure.
Frequently asked questions
How much resources are required to install Docker on a virtual server?
Docker itself is lightweight and consumes few resources, but the amount of RAM and CPU required depends on the applications you run in the containers. For starters and light projects, a server with 1 to 2 GB of RAM is sufficient.
What is the difference between container and virtual machine?
A virtual machine emulates a full operating system and consumes a lot of resources, while a container shares the core of the host operating system and is much lighter and faster. Containers run in seconds, but virtual machines take minutes.
Is Docker Compose installed separately?
In newer Docker versions, the Compose plugin is installed internally with the main package and is available with the docker compose command. So if you have installed Docker from the official repository, Compose is also ready to use.
How do I prevent container data from being deleted?
By using volume you can store data outside the writable layer of the container. This way, even if the container is deleted and rebuilt, the data remains. This method is essential for databases and important files.