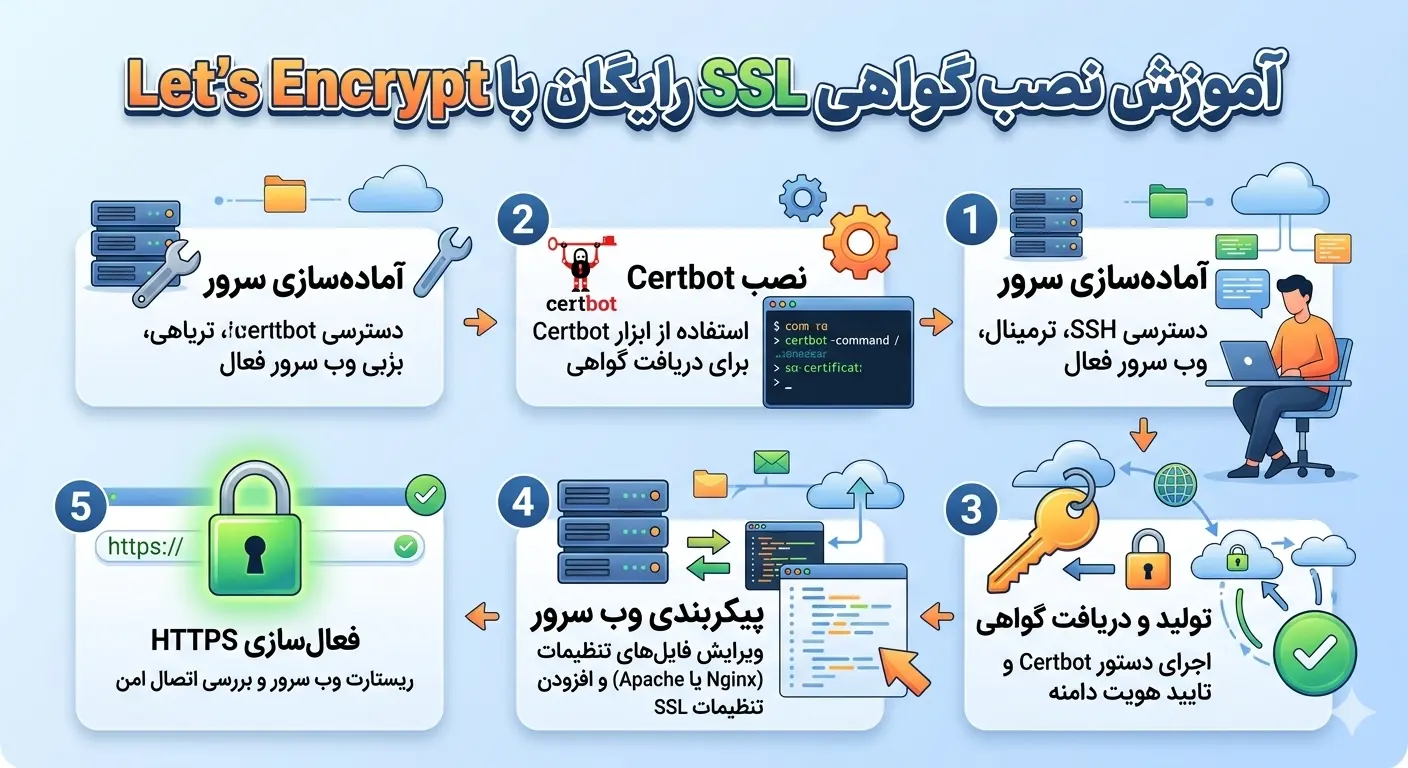
Installing free SSL on your server is no longer a luxury choice, but a security and SEO necessity. By encrypting the communication between the user's browser and your virtual server, the SSL certificate prevents data eavesdropping and manipulation and activates the same green lock next to the site address. Fortunately, with the Let's Encrypt project, you can get and renew a valid certificate completely free and automatically. In this step-by-step tutorial, you will learn how to install an SSL certificate on Nginx and Apache web servers and renew it automatically. If you don't have a server to host your site yet, you can start by buying a virtual server.
Why is it important to install free SSL?
An SSL/TLS certificate encrypts the communication between the user and the server. Without it, all data exchanged, including passwords, bank card information, and personal data, would be transmitted in plain text over the network and could be eavesdropped by anyone along the way. This issue is especially dangerous in public networks such as Wi-Fi in cafes.
In addition to security, there are other benefits. Modern browsers mark sites without HTTPS as "insecure", which destroys user trust. Google also considers HTTPS as a ranking factor, so installing free SSL will directly help your site's SEO as well.
What is Let's Encrypt?
Let's Encrypt is a non-profit Certificate Authority (CA) that issues valid SSL certificates for free and automatically. These certificates are recognized by all major browsers. The only important difference with commercial certificates is that their validity is 90 days, but the renewal process is completely automatic and you do not need manual intervention.
Let's Encrypt is based on a protocol called ACME. This protocol automatically verifies your domain ownership. The process is that Certbot receives a challenge from the Let's Encrypt server and must prove that you really control the domain or server. This verification is usually done in two ways: an HTTP challenge where a specific file is placed on your server and a DNS challenge where a specific record is added to the domain's DNS settings. After successful verification, the certificate will be issued.
Types of SSL certificate validation
SSL certificates are divided into three categories based on the level of validation, and knowing their differences will help you make the right choice:
- Domain Validation (DV): Only verifies domain ownership and is the fastest type. Let's Encrypt issues a certificate of this type and it is sufficient for most sites.
- Organization Validation (OV): In addition to the domain, the identity of the organization is also checked and requires documents.
- Extended Validation (EV): The strictest type that fully verifies the legal identity of the company and is mostly used for large and financial organizations.
In terms of cryptographic strength, all three types are exactly the same, and they differ only in the amount of identity validation. So for technical security, the free DV certificate is just as secure as the more expensive ones.
Free SSL installation prerequisites
Before you begin, make sure you have the following items ready:
- A valid domain name whose A record points to your server's IP.
- SSH access with a user with sudo access to the server.
- An installed web server (Nginx or Apache).
- Opening ports 80 and 443 in the firewall.
The important thing is that Let's Encrypt must be able to access your server through port 80 to verify domain ownership. So before starting, open the necessary ports in the firewall:
sudo ufw allow 80/tcp
sudo ufw allow 443/tcp
Install Certbot to get the certificate
Certbot is Let's Encrypt's official and recommended tool for obtaining and managing certificates. The recommended way to install it is to use snap, which always provides the latest version:
sudo apt update
sudo apt install snapd -y
sudo snap install --classic certbot
sudo ln -s /snap/bin/certbot /usr/bin/certbot
Of course, in many distributions you can also install Certbot directly from the apt repositories, which is simpler:
sudo apt install certbot python3-certbot-nginx -yInstalling Free SSL on Nginx
If you are using Nginx, Certbot can automatically edit your web server configuration and install the certificate. Just run the following command:
sudo certbot --nginx -d example.com -d www.example.comAt runtime, Certbot asks a few questions: your email (for expiration warnings), acceptance of the terms of use, and whether you want to automatically redirect HTTP traffic to HTTPS. It is recommended to select the redirect option so that all users are redirected to the secure version.
Once done, Certbot will install the certificate and update the Nginx configuration. Now your site is available on HTTPS. To make sure the configuration is correct:
sudo nginx -t
sudo systemctl reload nginx
Installing Free SSL on Apache
The process is very similar for Apache, only a different plugin is used:
sudo apt install python3-certbot-apache -y
sudo certbot --apache -d example.com -d www.example.com
Certbot will automatically edit the VirtualHost files and enable the SSL module.
Automatic certificate renewal
Since Let's Encrypt certificates are only valid for 90 days, auto-renewal is critical. Fortunately, Certbot does this automatically and installs a systemd timer or cron job to check periodically. You can run a dry-run to make sure the extension is working properly:
sudo certbot renew --dry-runIf this command runs without errors, auto-renew is working correctly. To check the timer status:
sudo systemctl status certbot.timer
sudo certbot certificates
The last command displays the list of installed certificates and the expiration date of each one.
Warning: The certificate is usually renewed when it reaches 30 days before expiration. If your server is down or port 80 is closed at the time of renewal, the renewal may fail. Be sure to enter a valid email when registering so that Let's Encrypt will warn you before it expires.
Advanced SSL security settings
Installing the certificate is only part of the job; For real security you should also harden the TLS configuration. One of the most important settings is to enable HSTS, which forces the browser to always use HTTPS. In the Nginx configuration, add:
add_header Strict-Transport-Security "max-age=31536000; includeSubDomains" always;You should also disable old and insecure protocols like TLS 1.0 and 1.1 and allow only secure versions:
ssl_protocols TLSv1.2 TLSv1.3;
ssl_prefer_server_ciphers on;
Checking the quality of the SSL configuration
After setting up, it is recommended to check the quality of your SSL configuration with online tools such as SSL Labs. This tool scores your configuration and points out potential weaknesses. The goal is to achieve an A or A+ grade.
Wildcard certificate for subdomains
If you have a lot of subdomains (like blog.example.com, shop.example.com, etc.), instead of getting a separate certificate for each one, you can get a wildcard certificate that covers all the subdomains. Issuing a wildcard certificate must be verified through a DNS challenge:
sudo certbot certonly --manual --preferred-challenges dns -d "*.example.com" -d example.comIn this case, Certbot will ask you to add a special TXT record in the domain's DNS settings to verify your ownership. To automatically renew a wildcard certificate, it is better to use the DNS plugins of your DNS provider to automate the verification process.
Force redirect to HTTPS
After installing the certificate, you should make sure that all HTTP traffic is automatically redirected to HTTPS. Although Certbot usually does this, it's best to check the configuration manually as well. A simple redirect block in Nginx looks like this:
server {
    listen 80;
    server_name example.com www.example.com;
    return 301 https://$host$request_uri;
}
This setting ensures that no user accidentally accesses an insecure version of the site and that all communications are encrypted.
Free and commercial certificate comparison table
| Feature | Let's Encrypt (Free) | Business certificate |
|---|---|---|
| cost | free | Annual payment |
| validity period | 90 days (automatic) | One to two years |
| Encryption level | Same and complete | Same and complete |
| Institutional Validation (OV/EV) | does not have | has |
| Financial guarantee | does not have | usually has |
For most websites, blogs, and small to medium-sized stores, the free Let's Encrypt certificate is more than enough. Business certificates with enterprise validation are more useful for banks and large organizations that need a special visual trust mark.
Install SSL without stopping the web server
Sometimes you don't want or can't let Certbot change the web server configuration, or you're using a non-standard web server. In this case, you can use standalone or webroot mode. In webroot mode, Certbot places the challenge file in the root folder of your site without stopping the webserver:
sudo certbot certonly --webroot -w /var/www/html -d example.comThis method is very suitable for production environments where you don't want the service to be interrupted even for a few seconds. After receiving the certificate, you manually introduce the path to the certificate files in your web server configuration. Certificates are usually stored in the /etc/letsencrypt/live/example.com/ path and include the fullchain.pem and privkey.pem files.
Using the test environment (Staging)
Let's Encrypt has a rate limit to prevent abuse; It means that you can only get a limited number of certificates in a certain period of time. If you are testing the configuration, be sure to use the staging environment so that your actual limit is not consumed:
sudo certbot --nginx -d example.com --stagingCertificates issued in the staging environment are not recognized as valid and are only for testing, but they assure you that the process works without problems. Once successful, run the same command without the staging flag to issue the actual certificate.
Troubleshooting common problems
If you're having trouble installing Free SSL, it's usually caused by one of the following:
- Domain verification error: The DNS record for the domain does not yet point to a server or has not yet been published.
- Port 80 is closed: A firewall or another web server is blocking Certbot access.
- Rate Limit: Let's Encrypt has a limit on the number of requests in a time period; Use staging environment in tests.
- Incorrect web server configuration: VirtualHost or server block files are not configured correctly.
One way to avoid rate limit error is to manage the number of requested certificates before any change and avoid unnecessary duplicate requests. Also, check how many subdomains you really need and combine them into a single certificate to save on the allowance.
By following the steps of this guide, your site will run safely and free on HTTPS and you will benefit from its security and SEO benefits. Keep in mind that installing SSL is only one part of overall server security and should be combined with a firewall, regular updates, and other hardening measures to have a truly secure infrastructure. To read more, you can refer to other Rapido Server articles.
Frequently asked questions
Is the free Let's Encrypt certificate really secure?
yes Let's Encrypt certificates use the same encryption standard as commercial certificates and are recognized by all major browsers. The encryption security level is completely the same and the only difference is in the type of validation and their validity period.
Why is my certificate only valid for 90 days?
Let's Encrypt intentionally keeps the credentials short for higher security; Short-lived certificates have a smaller window of abuse if the key is leaked. Because the renewal is fully automatic, this shortfall will not cause you any trouble.
Can I get a certificate for multiple domains?
yes You can include multiple domains and subdomains in one certificate by using multiple -d flags in the Certbot command. It is also possible to get a wildcard certificate to cover all subdomains that require verification through DNS.
What happens if auto-renewal fails?
If the renewal fails and the certificate expires, browsers will display an "unsecured connection" warning to users. To avoid this situation, be sure to register a valid email to receive an expiration warning and periodically check the validity of the renewal with the certbot renew --dry-run command.